Friday, May 25, 2012

Lazy Lasagna...

I'm going to be honest...
I don't have a picture of this because...
well...
it's really ugly and I didn't want to scare you away...
it's delicious and one of those foods that totally hits the spot...
trust me...
I love love love lasagna but it can sorta take awhile/be complicated...
so I created this little gem by combining a couple of different recipes and I loved it!
I really think that the egg noodles is what made it though...
the texture of those bad boys was perfect...

I hope you will at least try it!

Lazy Lasagna:

1 lb. hamburger, browned and drained
1 jar spaghetti sauce
1 lb. container cottage cheese
parmesan cheese, enough for your liking
cheddar cheese, about 1-1 1/2 cups
1 package egg noodles, prepared.

Preheat oven to 350 degrees.
 
Mix the hamburger and sauce together, add some parmesan cheese.  Layer the noodles in a greased 9 x 13 pan.  Spread the cottage cheese over the noodles and then spread the sauce over that.  Cover with shredded cheddar cheese.  Bake in the oven until cooked through and cheese is nice and melty...enjoy with your favorite garlic bread.

My kids don't like to see tomatoes in their dinner so I always blend up my chunky spaghetti sauce before I mix it in with the hamburger...also, I was afraid they would shy away from the cottage cheese cuz they don't like that either...so I blended it up with the sauce...this is why it looked soooo ugly and I couldn't fathom posting such a bad picture.  But it was good and that is all that matters...right?

See how easy...

Thursday, May 24, 2012

Instagram love...

I really really like Instagram cuz it's super easy...
but I feel like it's kinda cheating on my blog...
so these are a few of my recent Instagram photos...
The above photo is my cutie bug Jenner in her dance costume...
she is so excited for her recital next week she talks about it every second of the day!

This is my water-a-holic Addy watering my mother's day flowers for the umpteenth time...
I hope they can survive my squirmy 2 year old...


We love to have fire's in our backyard...
in fact, Chris has big plans for said fire pit and also an awning structure that will span our entire house...
I am lucky he's so talented...


Taylor was in the choir for her school this year and they just had an end of year concert...
this was their 'Footloose' performance and she looked so adorable in her old man suspenders...
Next year she will be on one of their competing teams and I am so excited!


Addy bug was making sure my frosting was as delicious as it looked...
I just love her hair in little piggy tails...
she is adorable...


Sometimes this is what happens around 10:30 pm around our house...
you see, these little girls are still in our room and they still don't have any kind of set bedtime and we sometimes (most of the time) can't stay up until they are ready to sleep...
so we set them up with a movie and wander back out to the front room sometime later and this is what we find...
so if you see lights on at my house at say 3:00 in the morning, it just means that we haven't rescued them from the couch yet...
move along...

My user name on Instagram is bartonfamilyco...
come follow me and I will follow you!
It's a date!

Wednesday, May 23, 2012

Oatmeal smoothie...


I heart Pinterest...
I pin all sorts of recipes and most of them have been a flop...
but I really like this one...
it sounded so weird but so good for you and filling that I had to try it...
my kids just die when they see me drinking it...
therefore I call it my sledge...
mmmmmm....

Oatmeal smoothie:
approx. 250 calories

1/4 cup oatmeal
3/4 cup milk (I used 1%)
1/4 cup yogurt, whatever flavor (I had yoplait light blackberry)
1/2 cup juice (I used grape)
3 Tbsp. dried fruit (I used cranberries)

Place the oatmeal in a blender, the bullet style one works really well.  Blend it's guts out till it resembles cornmeal.  Add the rest of the ingredients and blend away.  Let it settle for a minute so the fruit will re-assemble at the bottom and then blend again.  The fruit won't totally pulverize so don't worry if there are chunks.  This has to 'cure' in the refrigerator for a few hours so the oatmeal will soak up the liquid and get all yummy.  You could obviously substitute any kind of yogurt, juice or fruit...these were just what I had on hand. 

I make this in the evening so I can have it in the morning...I have to sorta shake it around and sometimes blend it up again cuz the oatmeal can settle in the bottom.  Just a heads up!
The original recipe called for Chia seeds and I am so intrigued by those little guys but I didn't have any so I continued on without them.  I am tempted to go and get some to see if they live up to their reputation.  They are supposed to expand a gajillion times their size in your stomach and make you feel super full so you can make through the in-between time of meals without being tempted to snack...or at least that's what I would hope they would do for me.  Interesting right?  Although, this smoothie really makes me feel super full and so maybe I don't need them...anyways, let me know if you try it and if you like it!

Friday, May 18, 2012

Sugar cookie bars...


These come to you courtesy of my friend Melanie...
if you like sugar cookies like I do, you will thoroughly LOVE this recipe...
but I warn you, they are super naughty when dieting...
I made them on Mother's Day where no calories were ever counted...
(well, they were but these weren't a part of it)

Sugar Cookie Bars:

Cream together until fluffy...
1 cup butter, room temperature soft
1 8 oz. package cream cheese, room temperature soft
1 1/2 cups sugar

Add:
1 egg
1 1/2 tsp. vanilla

Mix thoroughly.

Add:
3 1/2 cups flour
1 tsp. baking powder

Mix well and press into a greased jelly roll pan.  Bake at 375 degrees for 18-20 minutes or until very lightly browned on the edges.  Frost with buttercream frosting.  

Buttercream Frosting:

10 2/3 Tbsp. soft butter
1 tsp. vanilla
4 Tbsp. milk
4 cups powdered sugar

Beat all ingredients until fluffy and add desired food coloring.  

Note:  I use about 10 Tbsp. butter and I also add Almond extract for more flavor.  Love Love Love!!!

Friday, May 11, 2012

Homemade French Fries...

I've never even attempted to make french fries before because they always sounded so difficult...
I found a few recipes that I was curious about and I decided to combine two recipes to see how they would work...
Let me just say...
THEY ARE AMAZING!
the kids' friends thought they were fast food fries...
SCORE!


Homemade French Fries:

Preheat your oil on the stove-top to 400 degrees...super super hot! On my gas stove, I had the dial on high.  Also, preheat your oven to 425 degrees.

Peel and cut your potatoes into strips...I tried to make mine pretty thin and they turned out perfect.  Dry them really good on either some paper towel or a dish rag.   When the oil is ready, drop in your fries in batches.  The oil bubbles violently and the fries will not brown...this is good.  Keep them in there for a couple of minutes unless they do start to brown, in that case, pull em out early.  Drain them on some paper towel. 

Turn down your oil not so that it reaches about 350 degrees...on my gas stove it was medium.  After they have all been through the oil and drained, put them onto a tin foil lined cookie sheet...if you have a ton you will need to do two sheets.  (with three medium potatoes, they all fit on one)  Put them in the oven for 10-15 minutes.  The very tips of them will start to brown just a little.  

Now, when your oil is ready start the frying all over...in batches.  They will brown up pretty quick so keep a close eye on them.  After they have cooked, drain them and salt them well.  Enjoy...I have just discovered via Paula Deen that french fries dipped in mayo are to die for!  Try it!
 

Sunday, May 6, 2012

 She put on the famous wig again and asked me if she looked like Lady Gaga...
what does she even know about Lady Gaga?

Friday, May 4, 2012

The basement...

Remember how I told you we were getting close to getting the basement done...
well...
it's done and it's fabulous!
Glorious!
Wonderful!
I am so excited!!!

I promised pictures so don't be alarmed by the abundance of them...


Remember how I told you these bedrooms came to me in dreams...
well at first I really really wanted the boys room to have some grafitti in this corner...
and we had it all lined up to do...
then the kid who was going to do it for us ended up back in the big house...
so that idea was gone...
you can't have just anybody do grafitti for you...
it has to be someone with talent so I felt that my options were gone...

Dream # 2 for the boys...
the huge DC logo...
super excited about this idea!

I really wanted the boys to have their own closet...
and the bookshelf is behind the door so it was just wasted space that needed to be utilized...
insert genius!

Dream #3 was the stripes...
I was really pumped about this idea too...
I thought it would add just enough interest and color to the room to give that special something that I was looking for...
the chalkboard was an afterthought...
read on...


Here is Taylor's room...
she picked the bedding right off the bat and so I was in charge of dreaming up the walls...
this idea came to me to use some board to separate the two colors...
it looks so cool like that!

And the board serves a purpose too...
see those hooks...
they are going to line that whole wall at some point... 

The chalkboard idea was originally only supposed to be in her room...
but the piece of metal we got was huge and had to be cut in half...
so the boys decided that they wanted one too...
they are magnetic as well as chalkable...
now we just need to find some awesome magnets and chalk accessories!
Think of how cool this will be everytime her friends leave her notes and pictures on her board...
I'm dreaming of it now! 

The original plans of the house had a vanity in this room so we dubbed it officially as Taylor's...
what girl doesn't want a vanity in their room? 

This gem is the handywork of my super talented husband...
obviously the most beautiful bathroom I've ever seen this side of the Great Salt Lake...haha
we still need all the accessories like towels, curtain, MIRROR! 

I hesitated even taking a picture of the great room because of the hodge podge of CRAP in it...
the carpet was done yesterday morning and the kids started moving their stuff down there the second they walked in the door from school...
I couldn't wait for all of the toys to be down there so I ustilized their child labor energy and we moved everything toy related down there too...
hence the MESS! 


Thursday, May 3, 2012

Ol' Fashioned Donuts...

Photo courtesy of Christie's corner 

I found this recipe on Pinterest and I had to try them...I even saved up my calories by not eating a regular dinner to have these instead...it was so worth it!  I adapted them slightly and I got the picture from the blog the recipe was on because I couldn't figure out my intsagram thingy to get my picture on here.  They are delicious when they are hot...we saved a few for this morning and they were just okay.  I doubled the recipe and ended up with maybe 3 dozen donuts so if you want to go smaller, just keep it as is.  But my neighbors were thrilled that we had so many...hahaha

Ol' Fashioned Donuts

2 1/4 cups flour
1 1/2 tsp baking powder
1 tsp salt
1/2 cup sugar
2 tbsp shortening
2 large egg yolks
2/3 cup sour cream
canola oil for frying

Sift flour, baking powder, and salt together in a medium bowl, and set aside.

In a stand mixer fitted with a paddle, mix the sugar and shortening for 1 minute on low speed, until sandy. Add the egg yolks, then mix for 1 more minute on medium speed, scraping the sides of the bowl with a rubber spatula, until the mixture is light colored and thick.

Add the dry ingredients to the wet ingredients in three separate additions, alternating with sour cream, mixing until just combined on low speed and scraping the sides of the bowl each time. The dough will be sticky, like cookie/biscuit dough.

Transfer the dough to a clean bowl and refrigerate, covered with plastic wrap/cling film, for 45 minutes (or
up to 24 hours).

Heat up your oil in a large soup pot.  Roll out the dough to about 1/4 inch thick and cut with donut cutter...you can use a drinking glass and then a smaller bottle lid to make the hole if you don't have a donut cutter.  Drop about 5 donuts into hot oil, after about 10 seconds they will float to the top, flip them at this point.  Let them brown on the underside and flip them again.  After they are totally brown, lay them on a cooling rack that has been placed on a paper towel lined cookie sheet.  Let them cool for a couple of minutes and then dip in glaze.  YUM

Glaze

Powdered sugar (about 2 cups)
water (start small, maybe 1/4 cup and then go from there)
1-2 tsp. Karo syrup
vanilla

Make a glaze the consistency of honey adding water if needed to thin it out.

Sunday, April 22, 2012

Gelato...

For Christmas this last year, Chris' mom and dad gave us an ice cream maker...
we had one of those ones that you put in the freezer first and it worked fine but this new one is the old fashioned kind and can make way more...
I got a wild bug in me today and wanted to make some ice cream...
then I found some recipes via Pinterest for gelato and they sounded heavenly...
so we tried it and it was good...
I'm totally a texture eater and gelato is a bit different that ice cream...
it's got an icy crystal texture to it...
it seems a bit lighter...
it's made with milk instead of heavy cream which I like the flavor better that way too...

photo via google...

Vanilla Gelato:

4 cups milk
4 eggs
1/2 cup sugar
1-2 Tbsp. Karo syrup
vanilla

Blend ingredients in a blender until super creamy and pour into your machine to freeze.  When it's done, you can put it into the freezer to harden a bit more.  YUM

Chocolate Gelato:

3 cups milk
3/4 cup sugar
2 tbsp. cornstarch
3/4 cup unsweetened cocoa (I sift the cocoa to remove any lumps)

Instructions:
Bring 2 cups of milk to a simmer in a medium saucepan over medium heat; remove from heat. Meanwhile, combine 1 cup milk with sugar, cornstarch and cocoa in a bowl and stir into hot milk. Cook until sugar and cocoa dissolve. Allow to cool, then cover with plastic and refrigerate overnight.  Process mixture in an ice cream maker.  You don't need to churn it as long as you do ice cream - you want it to just be a custard sort of consistency, not completely frozen.  Store in the freezer in a container with plastic wrap pressed right on top. It's best the day you make it.  If it freezes hard, just remove it 10 minutes before you plan of serving it.

Recipe courtest of The Italian Dish blog

Note:  I haven't made the chocolate one yet cuz my kids are picky and only like vanilla...but trust me, I can already tell that it's going to be fabulous... 

I also found this recipe which I was going to make but didn't have sweetened condensed milk...it sound great too.

Vanilla Gelato:

2 3/4 cups whole milk
1 14-oz can sweetened condensed milk
1 tbsp vanilla extract

Mix ingredients in blender and mix until creamy.  Pour into ice cream maker and freeze.  Easy!

Monday, April 16, 2012

Tidbits...

My cable is out and my kids are bored so I have opted to update my blog...
and ignore their boredom cries...

Grady broke his elbow on Friday the 13th...
he has to be put to sleep so they can move the bone over a bit...
no cutting, just pushing...

Our basement is coming right along...
we are getting carpet in two of the rooms in a week...
so we can move 3 of the 5 down there...
so excited!

I planted about 100 tulips last year...
upside down...
but they found their way to the sun and they are looking so cute...
can't wait till there are like a bazillion of them...

We had a plumber come and hook up our downstairs bathroom...
I had him look at our water softener that hasn't worked the entire time we have lived here...
we now have soft water and it is lovely...
he also turned up my water pressure and can I just say AMAZING!
the first time I climbed into my shower I was assaulted by the strong water and I loved every minute of it...
he also looked at my kitchen faucet which is being weird and found some rust and corrosion inside...
he warranteed it for a new one...
yay me!

Had my first migraine ever on Easter day...
it was AWESOME...
not...
I don't wish one of those on anyone...
they are nasty...

I'm doing good on my calorie counting...
down a couple of more pounds but not sure exactly how many...
haven't been to the gym for a week cuz of migraine and a trip...
after the migraine I was completely useless for the next two days...
it was weird and I'm glad it's over...

Jenner had on a white shirt and some white knit shorts on the other day and proudly proclaimed..."now I have jammies like you and daddy"...
so funny...
almost died laughing...

I can't wait to get my two little girls into their own room and out of my bed...
I'm thinking it will take a few months to sleep train them completely but it will be worth it...
I'm doing a pink/gray/white color scheme in their new room...
so excited...

I'm weird in that I dream about how to paint and decorate my kids rooms...
Taylor's came to me right when we first started the basement and the boys came to me in steps...
I love the final product on both of them...
when we get the carpet in maybe I will take some pics to share...

until next time...

Friday, March 30, 2012

Lemon Crumb Muffins...

adapted from taste of home magazine


These I did not bake on a Sunday...
and I was WAYYYYY over my calories yesterday because of it...
Dang It!!!

But they are delicious and the reason I made them is so that Taylor could grab one out of the freezer at night, put it in the fridge and have them the next morning for breakfast...

The recipe made 51 muffins for me and they are about 235 calories each at that quantity...
the original recipe says it will make 40 muffins and then they are 300 calories each...
FYI...

Lemon Crumb Muffins:

2 cups butter melted
2 cups sour cream
8 eggs
3 Tbsp. grated lemon peel
2 Tbsp. lemon juice
Cream this together until smooth.

Add:
4 cups sugar
6 cups flour
3/4 tsp. baking soda
3/4 tsp. salt

This makes a very thick batter but trust me, they are so good!

Fill greased muffin lined cupcake pan with the large pampered chef scoop.  (this made 51 for me)  Top with struesal topping...generously.

Struesal topping:
1 cup flour
1 cup sugar
1/3 cup cold butter
Mix this until course crumbs

Bake in a 350 degree oven for 20-25 minutes.  Cool for a few minutes and drizzle with lemon glaze.

Lemon glaze:
1/2 cup sugar
1/3 cup lemon juice
Mix in a magic bullet or small blender or just by hand vigorously...

Drizzle liberally and remove from pans so they don't stick...these freeze beautifully which is why I like them...Breakfast for Taylor for a whole month...yes please!!!  (I shared the rest with some neighbors) 

Note:  You will need about 3 large lemons for the entire recipe.

Inside view
Beautiful!


for the sake of the picture I had to eat some...


again...
for the sake of some good pictures, I took another bite...
and for the record...
I only ate two!

Tuesday, March 27, 2012

Cheesey Bread...


I'm not gonna lie...
I have more dissappointments than successes from Pinterest recipes...
but this one makes up for all those mess ups...
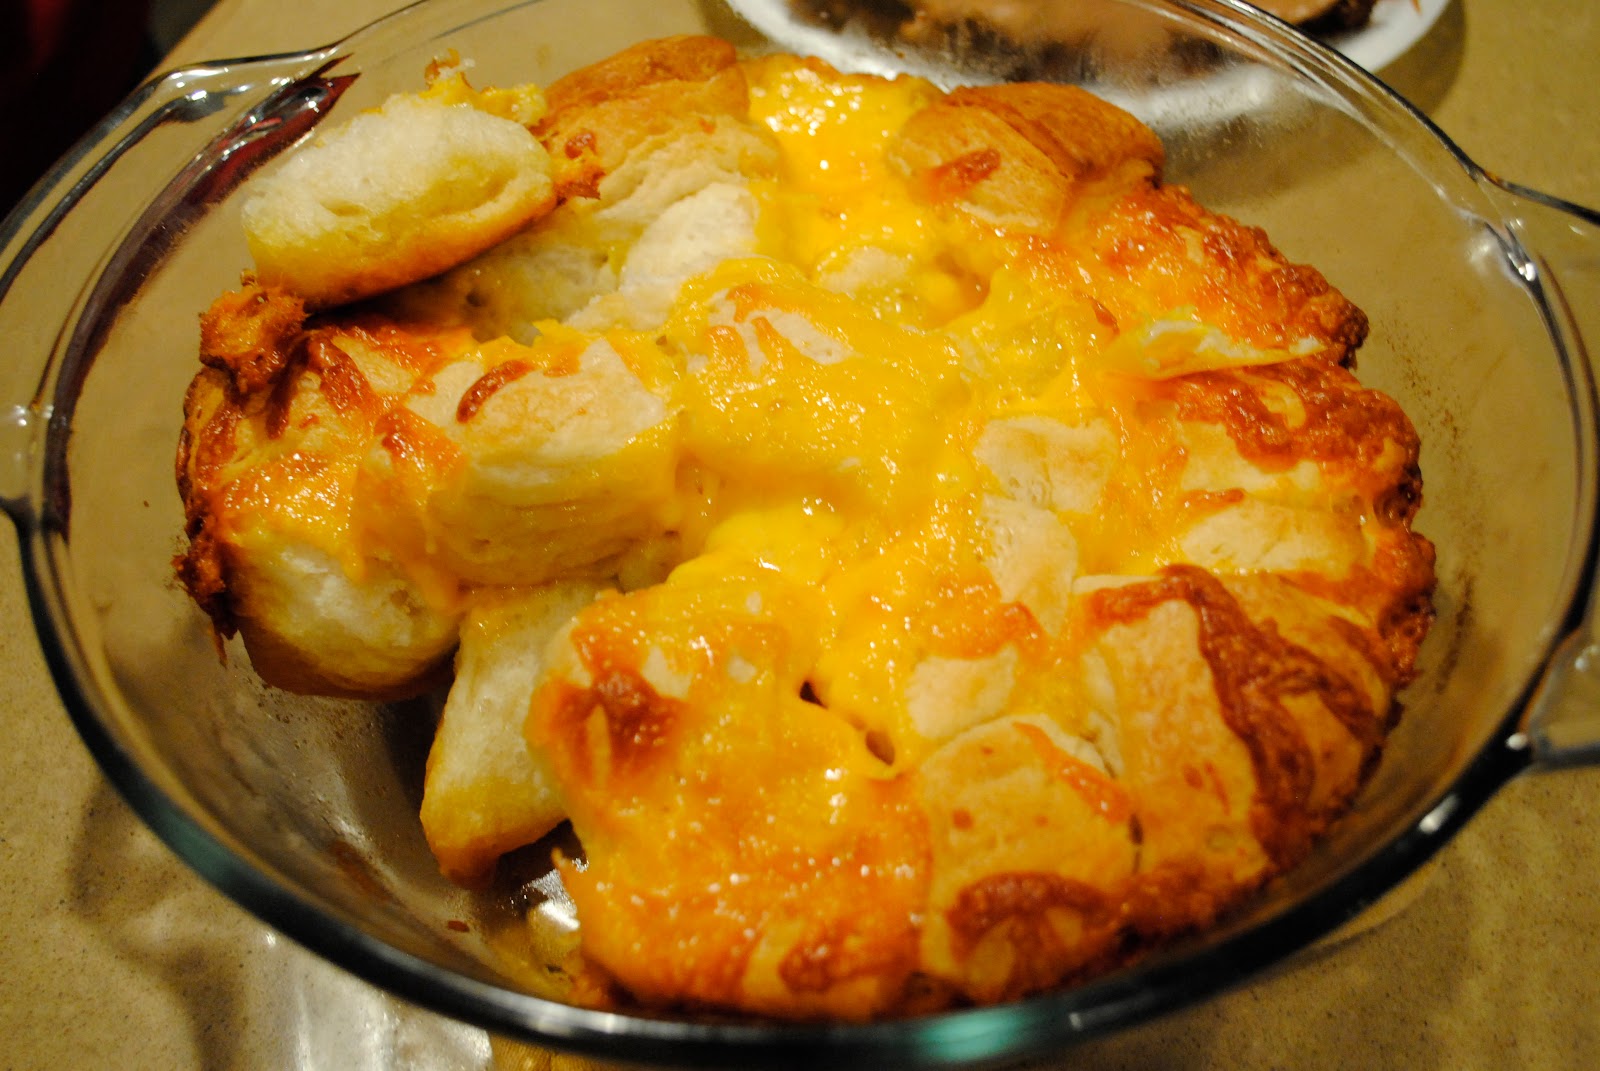
Cheesey Bread!
nuff said...


Cheesey Bread:

1 can biscuits (I used the large flaky ones)
butter, melted
cheese

Spray your pan, I used a round baking dish, pour melted butter into dish.  Cut biscuits into fourths and pile them in the dish.  Mix it all around so the butter is covering every biscuit.  Sprinkle shredded cheese all over the biscuits making sure to get it on the ones on the bottom too.  Bake in a 350 degree oven for about 30 minutes.

Variation:  I made two pans of these and in the second one I sprinkled some garlic salt and parmesan cheese over the biscuits too...they were divine!

My favorite part was the very bottom pieces that had oodles of butter on them and some overcooked cheese on the edges...chewy goodness!!!

Monday, March 26, 2012

Consumption...

I'm busy...
I'm bored with the ol' blog...
I'm not sure anyone even reads it...
I have been completely obsessed with my consumption of calories as of late...
and I have been bustin my butt at the gym 5 times a week too...
I'm not a runner at all...
and I'm okay with that...
I can kill myself walking uphill instead...
and it burns a jazillion more calories than walking on a flat surface...
it feels good...
I have been doing this 'routine' now for about 5 weeks...
and I have lost 6.4 lbs...
not much you say...
well, it's a whole lot to me...
it's proof that my hard work and dedication is paying off...
I'm actually doing it and seeing results...
my consumption of calories is very limited...
like 1350 to 1500 a day limited...
you could eat that many calories in one meal at most restaurants...
but it's not as hard as I was expecting...
I am doing so well with it and I have surprised myself with my dedication...
I have one day a week that I let myself bake and have a treat...
it's Sunday and I am thinking of starting a new recipe blog called...
The Sunday Baker...
but we'll see, cuz I'm busy...
as stated above...
so that's my story...

Saturday, March 17, 2012

Nailed It!

I made one of those beautiful Rainbow cakes for my sis-in-laws birthday...
They looked a little tricky but doable...
I totally nailed it!


Don't ya think?

Wednesday, February 15, 2012

Loving It...

Lately I have a few 'Loves' in my life that I wanted to honor in the name of Valentine's Day...
I know I am late on this but who gives anyways...

I just got this little gem the other day and I am already in love...
so useful and so fun to use...


I just started watching this show the other day and now I am obsessed...
It is amazing what the chefs can come up with in such a small amount of time and with all those weird ingredients!


Another show that I love...
mostly because it's dumb and mindless...
but also because I am sorta proud of Chelsea for growing up a bit...
weird, I know!


My bro-in-law got me hooked on this stuff...
it's so good but doesn't sound good in the slightest...
I love it...
 
 
I used to make sugar cookies all of the time and then got really sick of them...
since then I have been searching endlessly for a good recipe...
and I found it (see earlier post)
and now I want to make them again!


I really really love my sleep and I sure do miss the relationship we used to have...
now we are sorta broken up and not speaking with each other...
I can't wait for the day when we are back together...
and if you have any special remedies for getting sleep, send them my way!

And let's not forget my boyfriend...
Diet Coke...
and more specifically, McDonald's Diet Coke...
so if you are ever around the McD's and feel like doing a girl a solid...
I would love you forever!
hahaha

And last but certainly not in the least...
I love this guy...
he gets me...
he knows me...
he puts up with me...
he completes me...
He is my one and only!

(cheesey)


So there you have it...
some of my loves as of lately...
I hope you all had a great Love Day...
and I hope you all have some great 'Loves' too!

Tuesday, February 14, 2012

Cutler's Sugar Cookies...


I found this amazing copycat recipe on pinterest...I must say that they are as close as it gets to a scrumptious Cutler's sugar cookie...Have fun making them!

Cutler's Sugar Cookie:

3 sticks butter, softened
2 cups sugar
3 eggs
1 tsp. vanilla
1/2 tsp. salt
1 1/2 tsp. baking powder
5 cups cake flour

Mix butter and sugar until fluffy, about 3 minutes.  Add eggs and vanilla and mix well, scraping sides of bowl.  Add salt, baking powder and cake flour.  Chill dough.

When dough is ready, preheat oven to 350 degrees and roll out dough about as thick as a pencil and cut out into shapes.  Place on ungreased cookie sheet and bake for 10-15 minutes.  They don't look done but may have some cracks on top and a little brown on the bottom edges.  I found that even though I cooked most of them at 13 minutes, it was a smidge too long.  They continue to set up after they are out of the oven.

Icing: (My recipe)

Powdered sugar
Karo syrup
water
flavoring (Almond, lemon etc.)

Get about 3 cups of powdered sugar in a bowl and add maybe 2 Tbsp. Karo.  Add some water and whisk it around adding more water if needed.  The consistency should be like the Karo syrup.  Add your flavoring, in this case I used Almond, and any colors you want.  When cookies are cooled, dip them upside down into the icing, scraping the excess off on the sides of the bowl and put them on a cooling rack so the icing will drip down around the cookie.  Decorate.

Wednesday, February 8, 2012

Peanut Butter Chocolate Chip Cookies...


I got this recipe off of Pinterest and you can view the link here...(of course I omitted and added a couple of things but they are essentially the same)

They are so good and everyone in my family is loving them...
I did add some mini M&M's to the mix cuz who doesn't love those...

Peanut Butter Chocolate Chip Cookies...

Ingredients:


* 1/2 cup butter, softened
* 1/2 cup peanut butter
* 1/2 cup granulated sugar
* 1/2 cup packed brown sugar
* 1/2 teaspoon baking soda
* 1/2 teaspoon baking powder
* 1 egg
* 1/2 teaspoon vanilla
* 1 1/4 cups all-purpose flour
* 1/2 to 1 cup semi-chocolate chips (I added 1/2 cup choc chips and 1/2 cup mini M&M's)
Preheat oven to 375 degrees.  Mix butter and peanut butter until smooth.  Add sugars and mix until fluffy.  Add soda, powder and mix well.  Add egg and vanilla, mix. Add flour and mix until combined, scraping sides if necessary.  Then add choc chips and M&M's.  Use the small pampered chef scoop and place on greased baking sheets.  I rolled my cookies after scooping so they would be smooth looking.  Bake for 7-9 minutes being careful to not overbake.  They won't look or feel done but I can assure you that they are.  They just need to set up first.  Makes about 36 bite sized yummy goodness cookies.

Wednesday, February 1, 2012

Facts

Fact:  I'm tired.  Addy got her tonsils out Monday and she is a beast.  She is so sore and it is so sad to watch.  In the night when she swallows and cries it really breaks my heart.  Poor little sad one!

Fact:  I am bored with my blog.  What to post is just not on my list of priorities right now.  I still love it but I am struggling...Give me some suggestions of what to post.  That should be fun!

Fact:  I have tried to quit Diet Coke yet again...big FAIL!  I just love it way too much.  I am a victim to addiction...Hi, my name is Amy and I am a Diet-Coke-A-Holic.  Thank you...Thank you...I feel your love!

Fact:  Why do I think I need to quit anyways?

Fact:  My boys are silly.  They make me laugh every day.  The little girls are especially enamored with them and they are going to be so sad when they go back on track next week. 

Fact:  It's been an unusually warm January and I like it...but I am wondering what that's going to do to the rest of the year.

Fact:  I have a lot going on in my life right now and I am struggling with getting it all done.  Do you do that?  Struggle?  I mean, we all have stress and we are all busy but when I get more things to do than normal it really throws my mojo off...

Fact:  My breath really stinks.  Like REALLY stinks.  ewwwww

Fact:  I love that part of the day when I can take off my bra, put on my sweats and sit on the couch and watch meaningless tv shows.  Totally meaningless and something that doesn't require too much of my attention because let's face it, I am totally done at that point and just need to sit for awhile.

Fact:  Chris hates that part of my day because it's when I can totally tune out everything going on around me...even if that part of my day lasts like only 37 seconds, it's still a favorite for me. 

Friday, January 27, 2012

Salsa...Restaurant Style

If you are like me than you love love love restaurant style chips and salsa.  Problem is, you can only get them at the restaurant...until now!  I found this recipe on Pinterest and it is soooo good!  I have made it a couple of times and I love it so much!  I changed it up a bit so it's just how I like it and you can add more of or less of any of the ingredients that you like.  The first time I made it I used the whole can of the jalapenos and it was almost un-edible...hahaha...lesson learned!


Restaurant Style Salsa:

1 large can diced tomatoes
1 tsp. minced onion
1 tsp. garlic salt
1 tsp. cumin
1 tsp. sugar
salt & pepper
jalapenos (I buy the can of the halved ones and use one and one-half of those...so basically its like 3/4 of a jalapeno...not the whole can but they are super cheap and so I don't feel too bad)

Put all ingredients in your bullet machine or just a regular blender and blend until super smooth.  Refrigerate until the next day and Voila...super yummy salsa.  You can also add some cilantro or some lime juice if you like.  I am also super snobbish about my chips and I have found that here in Utah, you can buy Juanitas chips at most grocery stores and they are as close as it gets to warm, crispy, fresh chips from a restaurant.