Showing posts with label easy. Show all posts

Friday, October 12, 2012

Pumpkin Muffins

Post Edit:  I did not use vanilla paste because I don't even know what that is, I just doubled regular liquid vanilla.
And, I didn't use any cloves cuz I don't like them...but for the rest of the spices I was very heavy handed on them, just taste the batter before you bake and decide if you need more!


I found this recipe via Pinterest today and I had all of the ingredients (minus 1 egg, Thanks Sarah) to immediately whip them...
and lemme tell you...
hands down the BEST muffin I have ever had!


Oh, and I suggest you triple the batch!

Monday, June 18, 2012

Granola bar cookies...

Remember my granola bars and how good they are...
well these are just like them but in cookie form...
they are sooo good and sooo addicting so I suggest you should try them this very instant!


pictures from my phone = low quality (phone pictures are just easier to upload)


Granola bar cookies:

Cream together:
1 cup butter, softened
1 cup brown sugar
1 cup sugar
1 cup peanut butter

Add:
2 eggs
1 tsp. vanilla
1/4 tsp. salt
1 tsp. baking soda 
1 tsp. baking powder
2 cups flour
2 cups oatmeal (I used quick cooking)
Mix well.

Add:
1 cup mini chocolate chips (or more if you like)

Use the medium pampered chef scoop and place them on an ungreased cookie sheet.  They don't spread so you can load up your cookie sheet pretty good, I did 16 to a sheet.  Bake in a preheated 350 degree oven for 10-12 minutes.  They are better a little softer so adjust your baking time accordingly.  Makes approx. 3 1/2 dozen cookies.  

And don't forget to pace yourself...you will most definitely be addicted like we are!


Friday, May 25, 2012

Lazy Lasagna...

I'm going to be honest...
I don't have a picture of this because...
well...
it's really ugly and I didn't want to scare you away...
it's delicious and one of those foods that totally hits the spot...
trust me...
I love love love lasagna but it can sorta take awhile/be complicated...
so I created this little gem by combining a couple of different recipes and I loved it!
I really think that the egg noodles is what made it though...
the texture of those bad boys was perfect...

I hope you will at least try it!

Lazy Lasagna:

1 lb. hamburger, browned and drained
1 jar spaghetti sauce
1 lb. container cottage cheese
parmesan cheese, enough for your liking
cheddar cheese, about 1-1 1/2 cups
1 package egg noodles, prepared.

Preheat oven to 350 degrees.
 
Mix the hamburger and sauce together, add some parmesan cheese.  Layer the noodles in a greased 9 x 13 pan.  Spread the cottage cheese over the noodles and then spread the sauce over that.  Cover with shredded cheddar cheese.  Bake in the oven until cooked through and cheese is nice and melty...enjoy with your favorite garlic bread.

My kids don't like to see tomatoes in their dinner so I always blend up my chunky spaghetti sauce before I mix it in with the hamburger...also, I was afraid they would shy away from the cottage cheese cuz they don't like that either...so I blended it up with the sauce...this is why it looked soooo ugly and I couldn't fathom posting such a bad picture.  But it was good and that is all that matters...right?

See how easy...

Wednesday, May 23, 2012

Oatmeal smoothie...


I heart Pinterest...
I pin all sorts of recipes and most of them have been a flop...
but I really like this one...
it sounded so weird but so good for you and filling that I had to try it...
my kids just die when they see me drinking it...
therefore I call it my sledge...
mmmmmm....

Oatmeal smoothie:
approx. 250 calories

1/4 cup oatmeal
3/4 cup milk (I used 1%)
1/4 cup yogurt, whatever flavor (I had yoplait light blackberry)
1/2 cup juice (I used grape)
3 Tbsp. dried fruit (I used cranberries)

Place the oatmeal in a blender, the bullet style one works really well.  Blend it's guts out till it resembles cornmeal.  Add the rest of the ingredients and blend away.  Let it settle for a minute so the fruit will re-assemble at the bottom and then blend again.  The fruit won't totally pulverize so don't worry if there are chunks.  This has to 'cure' in the refrigerator for a few hours so the oatmeal will soak up the liquid and get all yummy.  You could obviously substitute any kind of yogurt, juice or fruit...these were just what I had on hand. 

I make this in the evening so I can have it in the morning...I have to sorta shake it around and sometimes blend it up again cuz the oatmeal can settle in the bottom.  Just a heads up!
The original recipe called for Chia seeds and I am so intrigued by those little guys but I didn't have any so I continued on without them.  I am tempted to go and get some to see if they live up to their reputation.  They are supposed to expand a gajillion times their size in your stomach and make you feel super full so you can make through the in-between time of meals without being tempted to snack...or at least that's what I would hope they would do for me.  Interesting right?  Although, this smoothie really makes me feel super full and so maybe I don't need them...anyways, let me know if you try it and if you like it!

Friday, May 18, 2012

Sugar cookie bars...


These come to you courtesy of my friend Melanie...
if you like sugar cookies like I do, you will thoroughly LOVE this recipe...
but I warn you, they are super naughty when dieting...
I made them on Mother's Day where no calories were ever counted...
(well, they were but these weren't a part of it)

Sugar Cookie Bars:

Cream together until fluffy...
1 cup butter, room temperature soft
1 8 oz. package cream cheese, room temperature soft
1 1/2 cups sugar

Add:
1 egg
1 1/2 tsp. vanilla

Mix thoroughly.

Add:
3 1/2 cups flour
1 tsp. baking powder

Mix well and press into a greased jelly roll pan.  Bake at 375 degrees for 18-20 minutes or until very lightly browned on the edges.  Frost with buttercream frosting.  

Buttercream Frosting:

10 2/3 Tbsp. soft butter
1 tsp. vanilla
4 Tbsp. milk
4 cups powdered sugar

Beat all ingredients until fluffy and add desired food coloring.  

Note:  I use about 10 Tbsp. butter and I also add Almond extract for more flavor.  Love Love Love!!!

Friday, May 11, 2012

Homemade French Fries...

I've never even attempted to make french fries before because they always sounded so difficult...
I found a few recipes that I was curious about and I decided to combine two recipes to see how they would work...
Let me just say...
THEY ARE AMAZING!
the kids' friends thought they were fast food fries...
SCORE!


Homemade French Fries:

Preheat your oil on the stove-top to 400 degrees...super super hot! On my gas stove, I had the dial on high.  Also, preheat your oven to 425 degrees.

Peel and cut your potatoes into strips...I tried to make mine pretty thin and they turned out perfect.  Dry them really good on either some paper towel or a dish rag.   When the oil is ready, drop in your fries in batches.  The oil bubbles violently and the fries will not brown...this is good.  Keep them in there for a couple of minutes unless they do start to brown, in that case, pull em out early.  Drain them on some paper towel. 

Turn down your oil not so that it reaches about 350 degrees...on my gas stove it was medium.  After they have all been through the oil and drained, put them onto a tin foil lined cookie sheet...if you have a ton you will need to do two sheets.  (with three medium potatoes, they all fit on one)  Put them in the oven for 10-15 minutes.  The very tips of them will start to brown just a little.  

Now, when your oil is ready start the frying all over...in batches.  They will brown up pretty quick so keep a close eye on them.  After they have cooked, drain them and salt them well.  Enjoy...I have just discovered via Paula Deen that french fries dipped in mayo are to die for!  Try it!
 

Sunday, April 22, 2012

Gelato...

For Christmas this last year, Chris' mom and dad gave us an ice cream maker...
we had one of those ones that you put in the freezer first and it worked fine but this new one is the old fashioned kind and can make way more...
I got a wild bug in me today and wanted to make some ice cream...
then I found some recipes via Pinterest for gelato and they sounded heavenly...
so we tried it and it was good...
I'm totally a texture eater and gelato is a bit different that ice cream...
it's got an icy crystal texture to it...
it seems a bit lighter...
it's made with milk instead of heavy cream which I like the flavor better that way too...

photo via google...

Vanilla Gelato:

4 cups milk
4 eggs
1/2 cup sugar
1-2 Tbsp. Karo syrup
vanilla

Blend ingredients in a blender until super creamy and pour into your machine to freeze.  When it's done, you can put it into the freezer to harden a bit more.  YUM

Chocolate Gelato:

3 cups milk
3/4 cup sugar
2 tbsp. cornstarch
3/4 cup unsweetened cocoa (I sift the cocoa to remove any lumps)

Instructions:
Bring 2 cups of milk to a simmer in a medium saucepan over medium heat; remove from heat. Meanwhile, combine 1 cup milk with sugar, cornstarch and cocoa in a bowl and stir into hot milk. Cook until sugar and cocoa dissolve. Allow to cool, then cover with plastic and refrigerate overnight.  Process mixture in an ice cream maker.  You don't need to churn it as long as you do ice cream - you want it to just be a custard sort of consistency, not completely frozen.  Store in the freezer in a container with plastic wrap pressed right on top. It's best the day you make it.  If it freezes hard, just remove it 10 minutes before you plan of serving it.

Recipe courtest of The Italian Dish blog

Note:  I haven't made the chocolate one yet cuz my kids are picky and only like vanilla...but trust me, I can already tell that it's going to be fabulous... 

I also found this recipe which I was going to make but didn't have sweetened condensed milk...it sound great too.

Vanilla Gelato:

2 3/4 cups whole milk
1 14-oz can sweetened condensed milk
1 tbsp vanilla extract

Mix ingredients in blender and mix until creamy.  Pour into ice cream maker and freeze.  Easy!

Tuesday, March 27, 2012

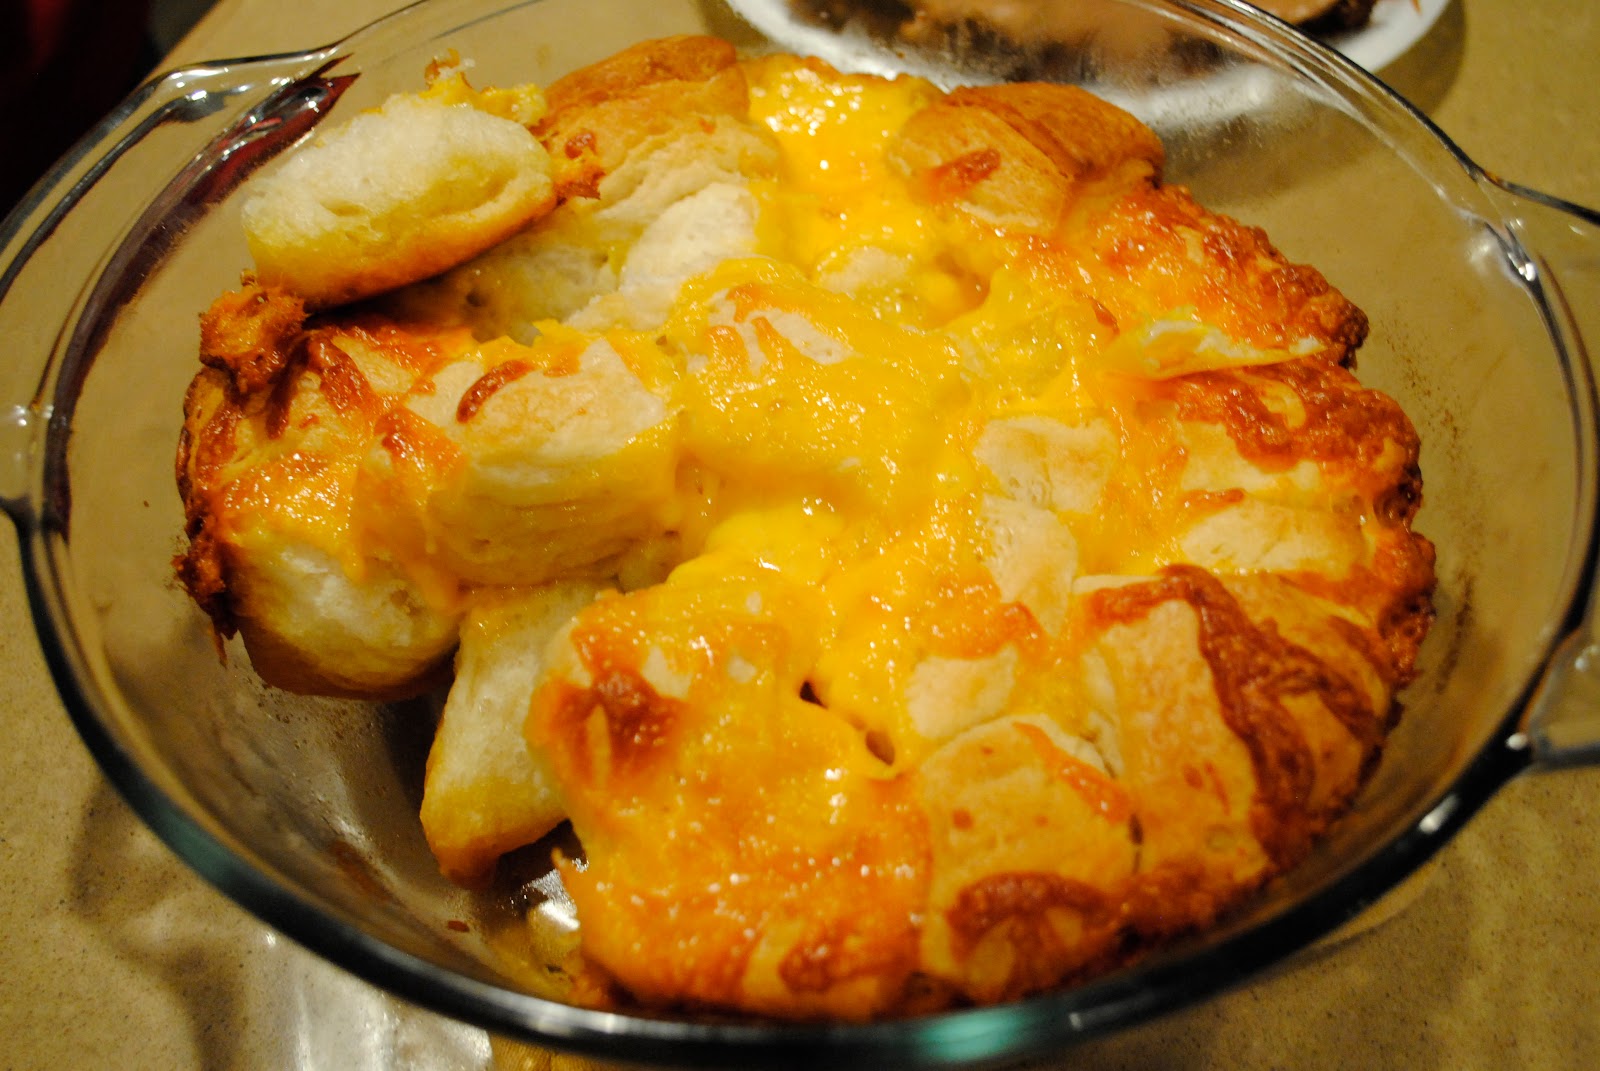
Cheesey Bread...


I'm not gonna lie...
I have more dissappointments than successes from Pinterest recipes...
but this one makes up for all those mess ups...
Cheesey Bread!
nuff said...


Cheesey Bread:

1 can biscuits (I used the large flaky ones)
butter, melted
cheese

Spray your pan, I used a round baking dish, pour melted butter into dish.  Cut biscuits into fourths and pile them in the dish.  Mix it all around so the butter is covering every biscuit.  Sprinkle shredded cheese all over the biscuits making sure to get it on the ones on the bottom too.  Bake in a 350 degree oven for about 30 minutes.

Variation:  I made two pans of these and in the second one I sprinkled some garlic salt and parmesan cheese over the biscuits too...they were divine!

My favorite part was the very bottom pieces that had oodles of butter on them and some overcooked cheese on the edges...chewy goodness!!!

Tuesday, February 14, 2012

Cutler's Sugar Cookies...


I found this amazing copycat recipe on pinterest...I must say that they are as close as it gets to a scrumptious Cutler's sugar cookie...Have fun making them!

Cutler's Sugar Cookie:

3 sticks butter, softened
2 cups sugar
3 eggs
1 tsp. vanilla
1/2 tsp. salt
1 1/2 tsp. baking powder
5 cups cake flour

Mix butter and sugar until fluffy, about 3 minutes.  Add eggs and vanilla and mix well, scraping sides of bowl.  Add salt, baking powder and cake flour.  Chill dough.

When dough is ready, preheat oven to 350 degrees and roll out dough about as thick as a pencil and cut out into shapes.  Place on ungreased cookie sheet and bake for 10-15 minutes.  They don't look done but may have some cracks on top and a little brown on the bottom edges.  I found that even though I cooked most of them at 13 minutes, it was a smidge too long.  They continue to set up after they are out of the oven.

Icing: (My recipe)

Powdered sugar
Karo syrup
water
flavoring (Almond, lemon etc.)

Get about 3 cups of powdered sugar in a bowl and add maybe 2 Tbsp. Karo.  Add some water and whisk it around adding more water if needed.  The consistency should be like the Karo syrup.  Add your flavoring, in this case I used Almond, and any colors you want.  When cookies are cooled, dip them upside down into the icing, scraping the excess off on the sides of the bowl and put them on a cooling rack so the icing will drip down around the cookie.  Decorate.

Wednesday, February 8, 2012

Peanut Butter Chocolate Chip Cookies...


I got this recipe off of Pinterest and you can view the link here...(of course I omitted and added a couple of things but they are essentially the same)

They are so good and everyone in my family is loving them...
I did add some mini M&M's to the mix cuz who doesn't love those...

Peanut Butter Chocolate Chip Cookies...

Ingredients:


* 1/2 cup butter, softened
* 1/2 cup peanut butter
* 1/2 cup granulated sugar
* 1/2 cup packed brown sugar
* 1/2 teaspoon baking soda
* 1/2 teaspoon baking powder
* 1 egg
* 1/2 teaspoon vanilla
* 1 1/4 cups all-purpose flour
* 1/2 to 1 cup semi-chocolate chips (I added 1/2 cup choc chips and 1/2 cup mini M&M's)
Preheat oven to 375 degrees.  Mix butter and peanut butter until smooth.  Add sugars and mix until fluffy.  Add soda, powder and mix well.  Add egg and vanilla, mix. Add flour and mix until combined, scraping sides if necessary.  Then add choc chips and M&M's.  Use the small pampered chef scoop and place on greased baking sheets.  I rolled my cookies after scooping so they would be smooth looking.  Bake for 7-9 minutes being careful to not overbake.  They won't look or feel done but I can assure you that they are.  They just need to set up first.  Makes about 36 bite sized yummy goodness cookies.

Friday, January 27, 2012

Salsa...Restaurant Style

If you are like me than you love love love restaurant style chips and salsa.  Problem is, you can only get them at the restaurant...until now!  I found this recipe on Pinterest and it is soooo good!  I have made it a couple of times and I love it so much!  I changed it up a bit so it's just how I like it and you can add more of or less of any of the ingredients that you like.  The first time I made it I used the whole can of the jalapenos and it was almost un-edible...hahaha...lesson learned!


Restaurant Style Salsa:

1 large can diced tomatoes
1 tsp. minced onion
1 tsp. garlic salt
1 tsp. cumin
1 tsp. sugar
salt & pepper
jalapenos (I buy the can of the halved ones and use one and one-half of those...so basically its like 3/4 of a jalapeno...not the whole can but they are super cheap and so I don't feel too bad)

Put all ingredients in your bullet machine or just a regular blender and blend until super smooth.  Refrigerate until the next day and Voila...super yummy salsa.  You can also add some cilantro or some lime juice if you like.  I am also super snobbish about my chips and I have found that here in Utah, you can buy Juanitas chips at most grocery stores and they are as close as it gets to warm, crispy, fresh chips from a restaurant.

Friday, November 25, 2011

Homemade Rolls...


K - Don't freak out!!!  Homemade rolls can be really easy to make with the right recipe...and I think this one is perfect!  It's super easy, makes a ton and they taste fantastic!

Homemade Rolls:

1 cup water
1 cup butter (2 sticks)
3/4 cup sugar
2 tsp. salt
1 cup cold water
4 1/2 tsp. yeast
1/2 cup warm water
4 eggs, beaten
7 1/2 cups bread flour
butter for spreading on dough and on top of rolls when they are out of the oven

Bring the 1 cup of water to a boil.  Add the butter, sugar and salt and remove from the heat.  When butter is mostly melted, add the 1 cup of cold water.  Let mixture come to room temperature.

In a separate bowl,  Dissolve yeast in the 1/2 cup warm water.

Pour the first mixture into a counter top mixer and add the yeast mixture and beaten eggs.  Mix briefly.   Add flour and stir together well.  It will seem like it is too sticky...but it's okay, I promise.  Cover tightly (I put mine in a greased ice cream bucket) and store in fridge overnight.

When ready to roll out, divide the dough into 6 equal parts.  On a lightly floured surface, roll each part into a circle and brush the circle with some melted butter.  Cut into 8 pieces and roll into crescent shapes.  Place on greased cookie sheets (24 to each sheet) and let rise for about 1 - 1 1/2 hours.

Bake in a 400 degree oven for 12-14 minutes.  After a few minutes out of the oven, brush tops with melted butter.  Makes 48 rolls.  Store any leftover rolls in an airtight container or bag.  So good!

The reason why I love this recipe and think it's easy is because of the refrigeration step...this step makes the dough sooo easy to work with.  I hope you like them as much as we do!

Saturday, November 12, 2011

Pizza Crust...

We made pizza's for YW the other night and I found this recipe on a blog and decided to give it a go...
it was soooo good!!!
and the crust was all brown and cooked all the way through...
unlike other recipes I have tried...
this will only make one pizza so I suggest doubling or tripling it if you are feeding a crowd the size of my crowd...


I can't remember the blog, but because I changed the recipe a bit so I don't feel too bad...
I did steal this picture from a blog too because I never took one of  my own...
doesn't that look delish?

Pizza Crust:

1/2 cup warm water (from the tap is good, I let mine get a little hot)
1 1/4 tsp. yeast
1 1/2 cups bread flour
1 tsp. salt

Combine the warm water and yeast in a bowl.  Let sit for 5 minutes.  Add the flour and salt and mix in a countertop mixer for 3-4 minutes.  Roll dough onto cookie sheet...no need to grease the sheet, just a little flour and you will be all set.  Top with your favorite toppings and bake.

The trick to a good pizza crust is a really hot oven and putting it on the lowest rack in your oven.  This recipe calls for a 420 degree oven and baking it for 11-13 minutes.  

Also, we tried doing a pizza without using any sauce and it was really good.  In fact, it was so good that I have to intention to ever make my pizza with sauce again!  The flavor really comes through with your toppings...YUM!

Friday, November 4, 2011

Chicken Tortilla Soup...


I found this recipe on the PW's tasty kitchen blog and I had to try it...
I love me a good tortilla soup but I don't love all of the work that goes into some of the recipes...
after I made my usual changes I was really pleased!
this was an easy one and it had a really good flavor...
I will be making it one of my staples for sure!

Chicken Tortilla Soup...

2 chicken breasts, poached and shredded
4 cans chicken broth
1 can Rotel Tomatoes with Lime juice and Cilantro
2 tsp. minced garlic
1 Tbsp. cumin
1 tsp. chili powder (I used less)
1 can black beans, rinsed thoroughly
1 carrot, cut into big pieces
Bring the broth to a boil and add tomatoes, garlic and spices.  Bring back to a boil and add beans, chicken and carrot.  The carrot is basically there to bring the spice down a bit...if you like it super spicy, skip adding the carrot.  Add the chicken and simmer for 20-30 minutes.  Take the carrot out and serve in bowls topped with tortilla strips, cheese, sour cream and avocado if you like!

I am assuming that you could use regular canned tomatoes and skip the whole carrot thing altogether but I really liked the cilantro and lime flavor in the rotel tomatoes.  Play around with it until you get the flavor how you like it!

Friday, October 28, 2011

Peach Cheesecake Dessert...


Renae's Peach Cheesecake:


16 graham crackers (crushed)
1 cube butter (melted)

Mix together and press into 9x13 pan.

1 3/4 cups water
1 cup sugar
2 Tbsp. cornstarch
1 (3 oz.) package orange jello
4 cups diced fresh peaches

Mix sugar and cornstarch together.  Add water and bring to a boil, stirring frequently.  Boil until thick and add jello powder, stir and chill.  Add peaches to mixture.

8 oz. cream cheese, room temperature
4 Tbsp. powdered sugar
12 oz. cool whip

Mix cream cheese and sugar first, then add cool whip.  Spread over crust.  Pour peach mixture over creamy mixture and chill until set.

Note:  I got to thinking that this would make a really great pie too...and it did...and it made 3 pies using store bought graham cracker crusts.  Genius!  So I had 3 pies to take out to some friends...and they are soooo yummy!

Thursday, October 27, 2011

Eggnog Pound Cake

Eggnog Pound Cake: 

1 16-oz. package pound cake mix
1 1/4 cups eggnog  
2 large eggs
1/2 teaspoon nutmeg 
1 teaspoon vanilla extract

Preparation

1. Preheat oven to 350°. Beat all ingredients together at low speed with an electric mixer until blended. Increase speed to medium, and beat 2 minutes. Pour into a lightly greased 9- x 5-inch loaf pan.

2. Bake at 350° for 1 hour to 1 hour and 5 minutes or until a long wooden pick inserted in center comes out clean. Cool in pan on a wire rack 10 minutes. Remove from pan to wire rack, and cool completely (about 1 hour).

3.  And to make it even more special...I made a glaze with some of the leftover eggnog and some milk and poured it right over the cake...It's literally sitting in a pool of heaven!

Tuesday, October 18, 2011

Zebra popcorn...

I know I have already posted this recipe before...
but it's so good and so easy to make...
and perfect for this weather...
I'm not sure why...
but it is!
So you should totally try it...
right now!


Find the recipe here...

Thursday, October 6, 2011

Wendy's Frosty...


So it's official...
I am addicted to Pinterest...
and I found this recipe on there and absolutely had to try it!
and it was wonderful...
so I suggest that you try it ASAP!!!

Wendy's Frosty:

16 oz. Cool Whip
1 can Sweetened Condensed Milk
Chocolate milk

Mix the cool whip and sweetened condensed milk together in the ice cream maker.  Pour chocolate milk in until it reaches the fill line (maybe about a gallon).  Freeze and enjoy!

In the big old fashioned Ice Cream makers...use this exact recipe.  But...in the smaller ones (like my Cuisinart), I halved the recipe.  Also...I added some hershey's syrup cuz my chocolate milk wasn't chocolatey enough for me.

Note:  These are so filling...we could hardly eat our entire cup of them...and it really wasn't a huge cup.  On the website it suggested using the lower fat versions of cool whip and sweetened condensed milk and I am going to try that next time. 

Saturday, October 1, 2011

Egg in the hole...

PW made these on her show a couple of weeks ago...
and my kids begged for them...
personally I thought that they would never eat them but was happy to make them and give them a try...
they all love them...
all but the little girls that is...
and so we made them again last night and I got a photo...
so I can share the recipe with ya!


Egg in the hole:

What you'll need:

Bread
eggs
butter (and lots of it)
salt and pepper
circle cutter

Directions:

Cut holes in the bread and save the holes.  Heat your pan on med-high heat and slather on the butter...a good amount.  Place the bread in the pan, making sure to soak up the butter.  Crack an egg into each hole...and at this point you can sort of 'scramble' the egg if you like, it's what my kids prefer but I like it whole.  Salt and pepper your egg.  After the bread has toasted to a nice golden brown, it's time to flip.  Now when I am at this point, I get my butter stick in one hand and the spatula in the other...I pick up the toast with the spatula hand, and rub more butter on the pan with the other hand.  This makes for a very tasty and toasty bread.  When the egg has cooked and the bread is a nice golden brown on the other side...remove it from the pan.  And, don't forget to toast up the little holes too...they are soooo good!

Friday, September 9, 2011

Fruit Leather...


I am seriously wondering where I have been all these years...I mean this stuff is soooooo good and sooooo easy to make!  I am beyond excited to whip up a ton of these for my kiddos and I am even more excited for the endless possibilities of flavors!  This one is Raspberry and next up is...Caramel Apple....I mean, can you imagine...an apple layer and a caramel layer on top...rolled up...delicious goodness all in one!

Homemade Fruit Leather:

48 - 64 oz applesauce
1 small box jello - any flavor

Puree the heck out of this either in your food processor or blender.  Pour out on a plastic wrap lined baking sheet (line the plastic wrap as close to edges as possible, avoid folding over the sheet...it won't melt because we are just drying out the fruit).  Spread the mixture all the way to the edges making it as even as possible.  I may look too thick but remember it is going to be drying in your oven and it will sort of shrink when the moisture evaporates.  Bake for 6-8 hours in a 170 degree oven until no longer tacky in the middle.  After it has cooled, separate from plastic wrap and put onto wax paper to cut and roll.  Store in airtight container.

Yum!

If the Caramel Apple works to my liking...I will totally be blogging about them!